Administration Portlets
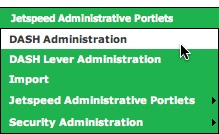
There are several administration portlets that control the functions of the DASH portal. To access them - login as an administrator and select Jetspeed Administration Portlets and click on MARVELit Admin
Contents
Setting Defaults and Default Data Base Connection
Selecting MARVELit Administration displays a page for entering the MARVELit License Key, setting the default data source, setting data maps and adding/updating data sources.
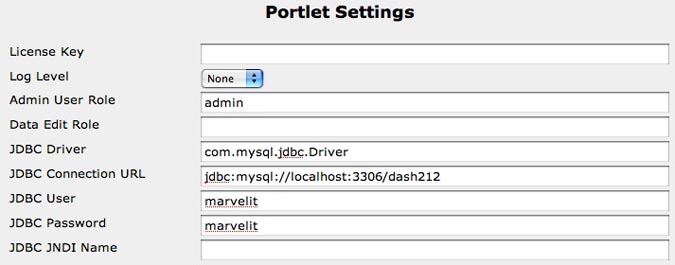
The first entry is for entering the MARVELit License key. Copy and paste the key that you received during the trial or purchase registration process. DASH will not operate without a valid License Key entered into this field.
The next section is setting some default values and connections. The first selection Log Level tells DASH to write values to a log file on the portal server. The available selections are:
None: Nothing is written to the log file
Error: Only Errors are written
Warn: Only Warnings and Errors are written
Info: Only informational messages are written
Debug: Everything is written - including each sql query executed by every portlet
Obviously - setting the Log Level to Debug would be helpful in error correction. A production portal should have its log level set to None.
The second section is the Default Admin User Role - leave this value set to admin.
Data Edit Role - is the role that has edit capabilities over any data entered in the Editable Report Portlet. Admin and the role entered here will always have edit/delete capabilities regardless of which users have created data in those tables. See Editable Report Portlet for additional information.
Finally - specific connection values are stored for the Default Connection Database. This connection information is used by the system to access the database where the DASH specific tables are stored. Once this is established - it should not need to be changed unless their is a server migration event.
Setting Data Maps
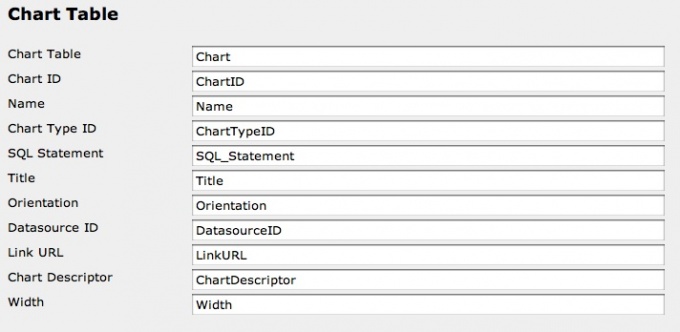
Data Maps enable MARVELit specific tables to be mapped (crossreferenced) to other tables at a client installation. There are X tables that need to be built as part of the installation. There tables will exist on the database of the default database connection in the previous section. To allow for flexibility in table and column naming conventions, a data map can be built. The MARVELit data names appear on the left - with the customizable name on the right. The installation defaults these entries to the MARVELit names. Only 1 table map is shown here. The following MARVELit Tables can be crossreferrenced:
Chart - contains information saved by the Chart Portlet
Chart Params - additional information saved by the Chart Portlet
Chart Type - contains information on available chart types
Editable Report - contains information on Editable Reports created
Editable Report Column - contains information on each column for every Editable Report
Meter Chart - contains information saved by the Meter Chart Portlet
Meter Chart Params - additional information saved by the Meter Chart Portlet
Meter Chart Range - additional information saved by the Meter Chart Portlet
Lever - contains information on each lever accessible
List - contains information used in report lists
List Items - contains specific values for a report list
Report Portlet - contains information saved by the Report Portlet
Report Portlet Params - additional information saved by the Report Portlet
Report Datasource - connection information for all datasources accessible by the portlets
Complete entries for any(all) tables - when completed - click the Save Properties button after the Report Datasource data map.
Adding Data Sources
Connection information for each data source accessible by the portlets must be added. Unlimited JDBC data sources can be added. The buttons next to each data source define actions available.
Save - update any values and click Save to write the new values to the Report Datasource table. Enter new data sources on a blank line and click Save to insert new data sources.
Delete - remove that data source from the Report Datasource table.
The values for each data source are as follows:
Data Source Name - this is the name associated with the data source. It will be in a pull down menu in all portlets where a SQL query is entered. That pulldown determines which data source the SQL query accesses.
Driver - the name of the JDBC driver for the data source. The JDBC jar file should be stored in the /shared/lib directory.
URL/JNDI Name - the database URL/JNDI for the data source. Usually contains IP Address or name. Other parameters may be database specific. Enter a JNDI name if you have configured DASH to use connection pooling for this data source - see Using Connection Pools for additional information.
User Name - the user name to be used to logon to the data source.
Password - the password for the user name to be used to logon to the data source
is JNDI - click this check box if you are using JNDI connection pooling for this data source. Allentries are ignored except the Datasource Name and JNDI Name.
Adding JDBC Drivers to DASH
JDBC drivers for your desired databases need to be added in order to be used by DASH. These drivers need to be stored in the /shared/lib folder. Simply copy the desired drivers into that folder - than reference them in the data sources.
We have bundled the top three datasources as part of the dash.zip (MySQL, SQL Server, Oracle). Look where you unpacked the dash.zip file. You should see these four items:
- mysql-connector-java-5.0.4-bin.jar (MySQL JDBC Driver)
- sqljdbc.jar (MS SQL JDBC Driver)
- jtds-1.2.1.jar (MS SQL JDBC Driver)
- classes12.jar (Oracle JDBC Driver)
If these files are not in your /shared/lib folder - you can download them from our web site Download JDBC Drivers, unzip and copy them into the /shared/lib folder. After you copy them in - restart dash per the instructions at Startup and Shutdown to make the drivers available.
Here are some example connection strings for each database:
Oracle
Driver Class Name = oracle.jdbc.driver.OracleDriver
URL = jdbc:oracle:thin:@10.211.55.3:1521:oracle (i.e. server = 10.211.55.3;port=1521;database=oracle)
MS SQL Server
sqljdbc.jar
Driver Class Name = com.microsoft.sqlserver.jdbc.SQLServerDriver
URL = jdbc:sqlserver://127.0.0.1;databaseName=dash (i.e. server = 127.0.0.1;database=dash)
jtds-1.2.1.jar
Driver Class Name = net.sourceforge.jtds.jdbc.Driver
URL = jdbc:jtds:sqlserver://127.0.0.1:1433/dash (i.e. server = 127.0.0.1;database=dash)
MySQL
Driver Class Name = com.mysql.jdbc.Driver
URL = jdbc:mysql://localhost:3306/demo21 ( i.e. server = localhost;port=3306;database=demo21)


