Editable Report Portlet
Contents
What is an Editable Report
The Editable Report Portlet allows you to create portlets to update data directly in your chosen database. It is useful in a number of ways:
1. Direct data entry into transaction tables to be used in dashboards
2. Updating of access and control information by specific users
3. Updating of reference information such as groups, offices, regions, etc.
4. Any other data entry or manipulation of dashboard tables.
Getting Started
The Data Entry Portlet works with an existing Report Portlet to display data in a list. See Report Portlet for specifics on creating a report using the report portlet.
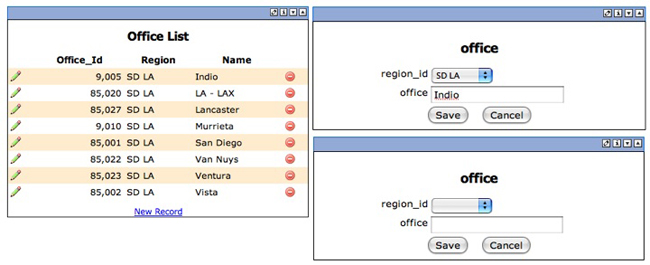
For Example purposes - we have created a report the lists offices. A portion of the report portlet is on the left with the resulting report on the right.
Display Primary Key in Report
An important part of the editable report is the primary key of the table to be edited. In the above report portlet - the Office_Id is the primary key of the Office table. We need to include this key in the report to be used by the editable report portlet.
It is important to note - that you should establish a single column in your table and designate that column as a primary key. The editable report uses this to update and insert new rows into the table. This key element should also be set up to auto increment - that way you do not have to worry about setting the key on inserts
The Editable Report Portlet
Now that we have created a list to use in the editable report - we can configure the portlet.
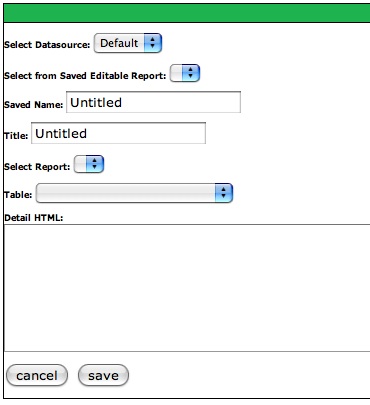
Select Datasource - select the datasource to be used in the editable report
Select from Saved Editable Report - A list of editable reports for the selected datasource will be displayed.
Saved Name - the name to be used when you save the portlet. This name will be listed in the previous pulldown when saved.
Title - the title to be displayed on the data edit screen
Select Report - the name of the report portlet to be used to display data for edit or entry. In the example above it would be Entry Office List.
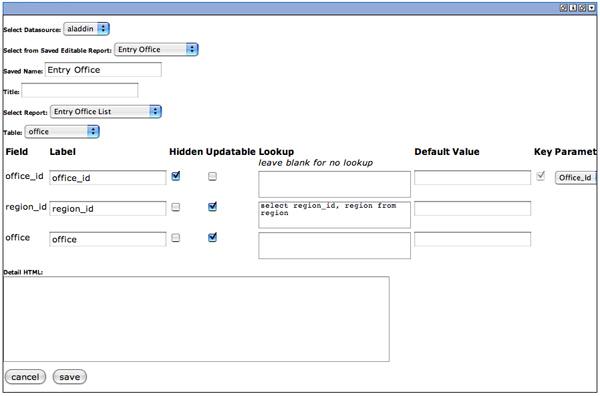
Table - this is the table name in your datasource that will be edited using the editable report portlet. In the above example - we would select the office table. When you select the table - the portlet adds the columns from that table to the portlet - see next image
When you select a table - the columns from that table are displayed. Additional columns are displayed in the portlet as well:
Field - the column name from the table selected
Label - the label to be displayed for that table column in the data edit screen
Hidden - specifies if the column is hidden on the data edit screen
Updatable - specifies if entries can be made in this column. If checked - a field will be displayed on the data edit screen for this column
Lookup - a sql statement that will create a pull down menu for users to select a value. The first value in the select statement will be set as the column value. The second value will be displayed in the pulldown menu. In this example - region_id will be saved - but region (name) is displayed in a pull down menu for user selection.
Default Value - default value for the column when saved
Key Parameter - box will be check if this is the primary key for the table. Will automatically be checked if specified in the table definition.
Detail HTML - section to enter detailed html that will be used instead of the default edit screen. This is a complex function and should only be used if you are an experienced html developer. See Advanced functions for additional information
Cancel: Cancel changes and display the report.
Save: Save changes and display the report.
Editable Report Portlet Behavior
When you click SAVE - the report portlet specified in the editable report portlet will be displayed with an edit (pencil) icon to the left of each item, a delete (red circle) to the right and a New Record Link.
Edit (Pencil) - click the pencil icon next to a row and that row is displayed in the data edit screen. In this example (top) the region is pre-populated in the pull down menu. The lookup in the editable report portlet executed and pre-selected the current value. Clicking SAVE will save any edits to the database - Cancel will cancel any edits. In both examples - the list of records will be displayed again.
Delete (red circle) - click the red circle - and the row is deleted. The list of records will be displayed again with the selection removed.
New Record - clicking the New Record link will display the data edit screen empty for entry. In this example (bottom) the screen is empty. The pulldown is populated and other updatable fields are available for entry. Click SAVE to save the new record or CANCEL to ignore the entry.
Data Entry Example
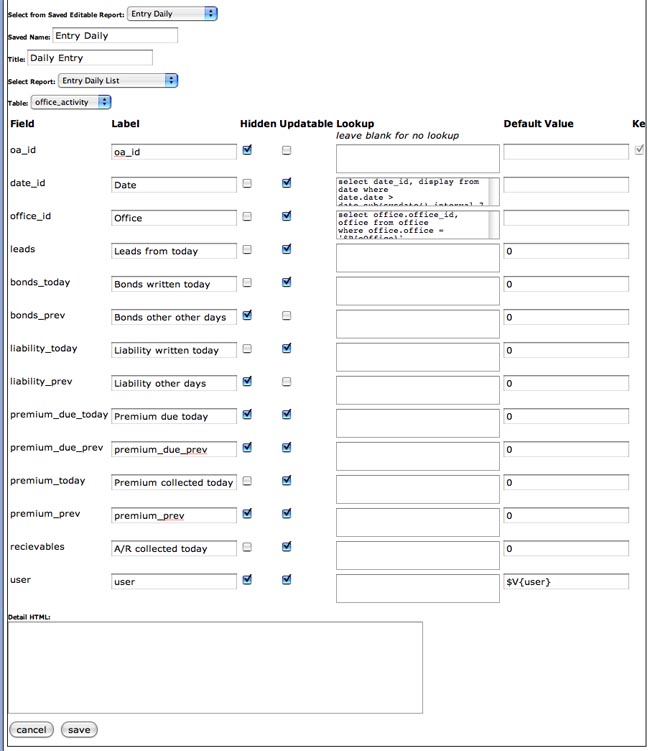
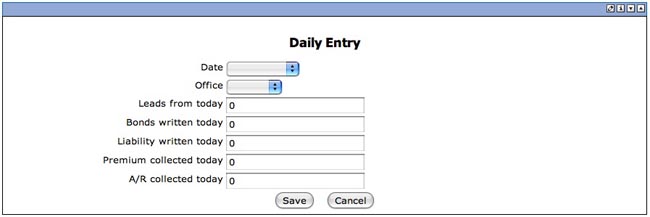
Here is a complex data entry form. As you can see - some columns are hidden and others updatable. Lookups are used to populate two fields and default values are specified.
This editable report displays this report
Setting up who can edit / delete records
If you want to control who can edit and delete records - do the following:
1. Add a column user to each table that will be accessed by the editable report portlet.
2. Like the above example - assign the $V{user} variable as the default value for the user column
3. Make sure to include the user column on the report portlet list. You can hide the column form user view if you wish by using the <column number='7' hidden="true"> attribute in the report portlet XML for that column.
Adding this functionality - ensures that who creates a row - can only be the one to edit or delete it. Any user you can access the editable report portlet can see the data - but the Edit icon changes to a view (magnifying glass) icon. Clicking the View icon will display the row in the data edit screen - but there is only a DONE button displayed
Admin or Dataedit access to edit / delete records
Users who have Admin role assigned will always be able to edit or delete data - regardless of who entered it.
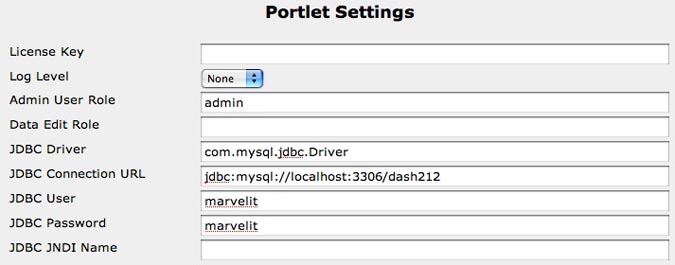
Users who have been assigned the dataedit role specified in the DASH Admin screen will also have edit and delete access to all data - but no admin functions. The role name specified in the Data Edit Role filed on this section needs to be entered as a Role Managing Roles and users assigned to that role Managing Users for this function to work.

