Jasper Report Portlet
Contents
Execute Jasper Reports in DASH
With DASH Professional - you can have users execute pre-defined jasper reports from within your dashboard. This is done in four parts:
1. Enter the location of .jasper report files so DASH can find them 2. Define an entry for the report and the data source to be used 3. Establish any report groups or user, group, role permissions for the report 4. Add a portlet to a page - so users can access and execute the reports
In order to have a Jasper Report executed by DASH - you will need to create a Jasper Report and successfully complile it. JasperSoft distributes an application called iReport that performs this function. As part of the report compliation process, a file is created with a .jasper extension. These files are what DASH needs to access to execute the report.
How to create a jasper report and compile it is out of scope for this wiki. We are assuming that you know how to do this. For additional information - here are some helpful links:
Set Jasper Report Location
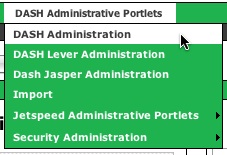
To tell DASH where your .jasper files are located - click DASH Administration under DASH Administrative Portlets
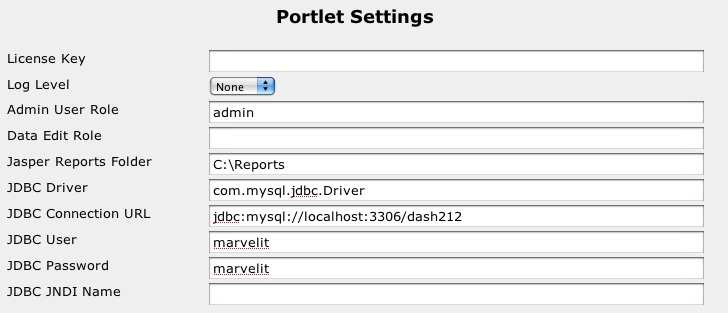
The top section of that page has an entry Jasper Reports Folder Enter the path on the dashboard server where the .jasper files are located. In this example - they are all stored in the c:\Reports folder.
Jasper Report Administration
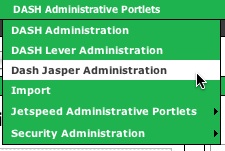
Once you have defined your Report Location - you need to define a jasper report to DASH. Select DASH Administration portlets, DASH Jasper Administration.
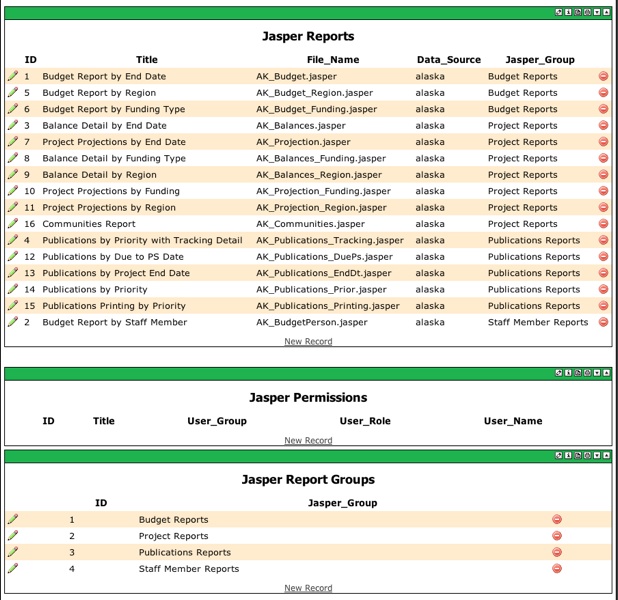
The DASH Jasper Administration page is displayed. Here you can define a report, set permissions and create report groups.
Define Reports
The top section of the page is where you define a Jasper Report. Click the edit (pencil) icon on the left of a report to edit or click the New Record link to create a new entry. The Jasper Report Entry Screen is displayed.
Enter the following fields:
Title: Enter a descriptive report title that will display on the screen for users to select.
File Name: Enter the name of the .jasper file for the report. This file must be in the folder specified in the Reports Folder entered on the Dash Administration Page. This name is case sensitive - make sure it is entered exactly as the file name.
Data Source: Select the datasource to be used for the report. Dash will execute the report against this datasource.
Group: Select the Report Group. Create Report Groups in the Report Group section of the page. These Groups will allow you to group reports together for users to see.
Click the Save Button to save the report definition or Cancel to reset the form. Refresh is not used.
Set Report Permissions
The middle section of the page allows you to define report permissions. Click the edit (pencil) icon on the left of a permisison to edit or click the New Record link to create a new permissionm. The Jasper Report Enter Permissions Screen is displayed.
Enter the following fields:
Title: Select the report title to be used for the permission
User Group: Enter the name of the user group that can access this report. See ... for information on creating User Groups in Dash.
User Role: Enter the name of the user role that can access this report. See ... for information on creating User Roles in Dash.
User Name: Enter the name of the user that can access this report. See ... for information on creating Users in Dash.
Click the Save Button to save the report definition or Cancel to reset the form. Refresh is not used.
Set Report Groups
The lower section of the page allows you to define report groups. Click the edit (pencil) icon on the left of a group to edit or click the New Record link to create a new group. The Jasper Report Enter Groups Screen is displayed.
Enter the following fields:
Jasper Group: Enter the name of the report group
Click the Save Button to save the report definition or Cancel to reset the form. Refresh is not used.
Adding Reports to a Dashboard Page
Once you have defined your reports, permissions and groups - you are ready to add reports to a dashboard page. This is done by using the Jasper Report Portlet. Add this portlet to any section of a page - just like any chart, meter or report. Click the edit (pencil) icon in the upper right corner of the portlet to add content. The portlet displays an entry screen:
Enter the following fields:
Title: Enter the title of the reports list. Use a descriptive name for users to see.
SQL: Enter the SQL Query to obtain a list of reports to be displayed. Use the Jasper Report Tables in the DASH Database and create a SQL query that displays a set of reports. In the example - all reports that are in report group 1 will be displayed. These are all the budget reports. You can can join to the Jasper Permissions table as well to obtain reports for specific users, groups or roles. Example SQL for this type of list would be:
1 2 3
Click the Save Button to save the report definition or Cancel to reset the form.
A list of reports based on the SQL entered in the portlet will be displayed. Users can clcik on the Export links to execute the report. Additionally, if your report uses parameters, add a Lever Portlet above the report list for users to select the values for the report. As long as the Lever Names match the parameters in the report - selecting values in Levers will be passed to the report.
Jasper Portlet Preferences
Preferences as set to enable pages to have the same behavior for all users. When a page is displayed - preferences are accessed in the database for the user/page combination. If that user has not accessed that page before than default preferences for the page are used. Thes have to be set for every portlet on a page. To add preferences - Click the Edit Defaults icon in the upper right corner of the Jasper Report Portlet. It is next to the edit (pencil) icons in the upper right corner of the portlet. The Edit Defaults Screen is displayed:
Once these entries are made - they are automatically added to the psml file for the page and will be available for all users.


