Edit Defaults
Contents
- 1 Set Your Portlet Preferences via Edit Defaults Mode
- 2 Setting Meter Chart Portlet Preferences
- 3 Setting Chart Portlet Preferences
- 4 Setting Report Portlet Preferences
- 5 Setting Editable Report Portlet Preferences
- 6 Setting Lever Portlet Preferences
- 7 Setting Jasper Portlet Preferences
- 8 Setting HTML Content Portlet Preferences
Set Your Portlet Preferences via Edit Defaults Mode
Preferences as set to enable pages to have the same behavior for all users. When a page is displayed - preferences are accessed in the database for the user/page combination.
If that user has not accessed that page before than default preferences for the page are used. Thes have to be set for every portlet on a page.
To add preferences - Click the Edit Defaults icon in the upper right corner of the any marvelit Portlet.
It is next to the i (help) icon in the upper right corner of the portlet. You need to set the preferences 1 time on every portlet on every page you build.
Setting Meter Chart Portlet Preferences
On a Meter Chart Portlet - open in Edit Mode (pencil icon) to obtain the ChartId (next to the Name pulldown menu) - this is the internal ID saved in the database. This ID needs to be added to the preferences when editing defaults.
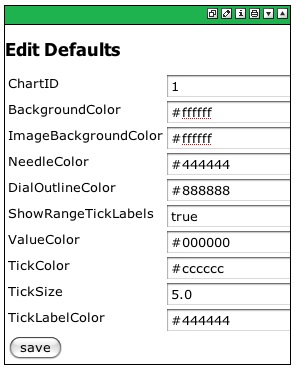
Click the edit defaults icon to display the Edit Defaults screen for the Meter Chart Portlet
Enter the following fields:
ChartID: Enter the ChartID when you opened the portlet in edit mode.
BackgroundColor: Enter a hex color for the actual meter chart background.
ImageBackgroundColor: Enter a hex color for the area around the meter chart.
NeedleColor: Enter a hex color for the needle.
DialOutlineColor: Enter a hex color for the thin line around the meter chart.
ShowRangeTickLabels: Enter true or false if you want the tick labels (range numbers) to show.
ValueColor: Enter a hex color for the value attributes on the meter.
TickColor: Enter a hex color for the tick marks on the meter dial outline.
TickSize: Enter the tick size in units - controls the number of ticks on the meter dial outline.
TickLabelColor: Enter a hex color for the range labels for the tick marks.
Click the Save button to save the preferences.
Setting Chart Portlet Preferences
On a Chart Portlet - open in Edit Mode (pencil icon) to obtain the ChartId (next to the Name pulldown menu) - this is the internal ID saved in the database. This ID needs to be added to the preferences when editing defaults.
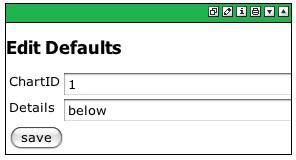
Click the edit defaults icon to display the Edit Defaults screen for the Chart Portlet
Enter the following fields:
ChartID: Enter the ChartID when you opened the portlet in edit mode.
Details: Enter above, below or none to display the data from the query as part of the chart display. Appears as a miniature report.
Click the Save button to save the preferences.
Setting Report Portlet Preferences
On a Report Portlet - open in Edit Mode (pencil icon) to obtain the ReportID (next to the Name pulldown menu) - this is the internal ID saved in the database. This ID needs to be added to the preferences when editing defaults.
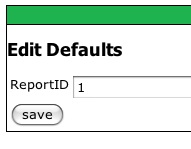
Click the edit defaults icon to display the Edit Defaults screen for the Report Portlet
Enter the following fields:
ReportID: Enter the ReportID when you opened the portlet in edit mode.
Click the Save button to save the preferences.
Setting Editable Report Portlet Preferences
On an Editable Report Portlet - open in Edit Mode (pencil icon) to obtain the EditableReportID (next to the Name pulldown menu) - this is the internal ID saved in the database. This ID needs to be added to the preferences when editing defaults.
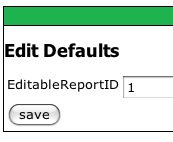
Click the edit defaults icon to display the Edit Defaults screen for the Editable Report Portlet
Enter the following fields:
EditableReportID: Enter the EditableReportID when you opened the portlet in edit mode.
Click the Save button to save the preferences.
Setting Lever Portlet Preferences
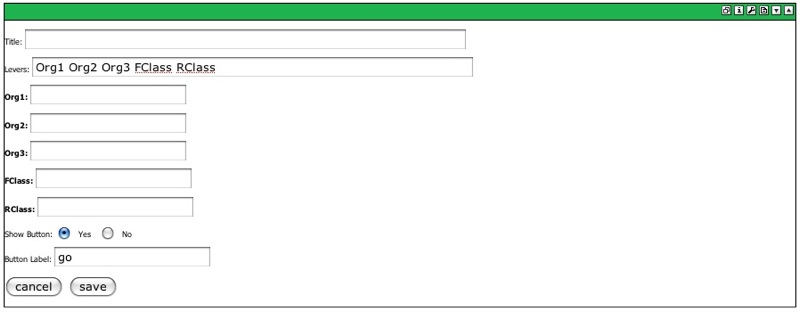
On a Levers Portlet - open in Edit Mode (pencil icon) to obtain the Levers content. Levers are stored in the page.psml files and not directly in a DASH table. So the data in edit mode needs to be set in Edit Defaults mode as well.
Here is a Levers Portlet displayed in Edit Mode:
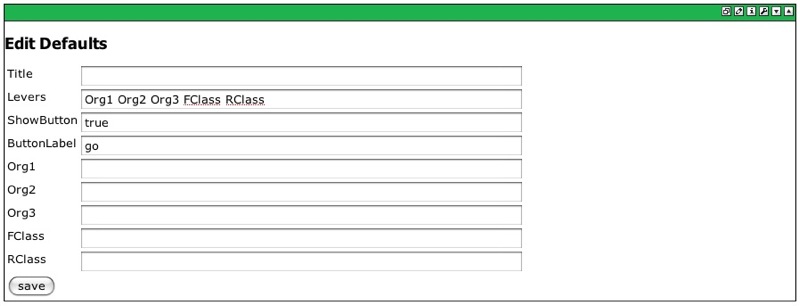
Click the edit defaults icon to display the Edit Defaults screen for the Levers Portlet
Enter the following:
Title: If a titlle was entered in edit mode - enter it here
Levers: Enter the Levers exactly like in edit mode - with <br> if used
ShowButton: enter true to display a button - false to not display a button
ButtonLabel: enter the text from the Button Label in edit mode
Lever Default Values: Enter a default for each lever entered in the Levers
Click the Save button to save the preferences.
Once these entries are made - they are automatically added to the psml file for the page and will be available for all users.
Setting Jasper Portlet Preferences
On a Jasper Report Portlet - open in Edit Mode (pencil icon) to obtain the Jasper content. Jasper data is stored in the page.psml files and not directly in a DASH table. So the data in edit mode needs to be set in Edit Defaults mode as well.
Here is a Jasper Portlet displayed in Edit Mode:
Click the edit defaults icon to display the Edit Defaults screen for the Jasper Portlet
Enter the following fields:
title: Enter the title to display at the top of the portlet
sql: Copy the SQL query from edit mode and paste it here
Click the Save button to save the preferences.
Setting HTML Content Portlet Preferences
On an HTML Content Portlet - open in Edit Mode (pencil icon) to obtain the ContentID (next to the Name pulldown menu) - this is the internal ID saved in the database.
Click the edit defaults icon to display the Edit Defaults screen for the HTML Content Portlet
Enter the following fields:
ContentID: Enter the ContentID when you opened the portlet in edit mode.
Click the Save button to save the preferences.


